")


Want to sew flange binding to take your sewing and quilting skills to the next level, but do not know where to begin? Don’t worry, we got you covered!
Here’s a guide for everything you need. In this piece, we will over over the definition and basic know how flange binding, Its two different types every beginner should know about and finally explore some variation technique to make you stand out
Sounds interesting to learn? Let’s begin by covering the basic definition.
1. Why Do People Use Flange Binding?
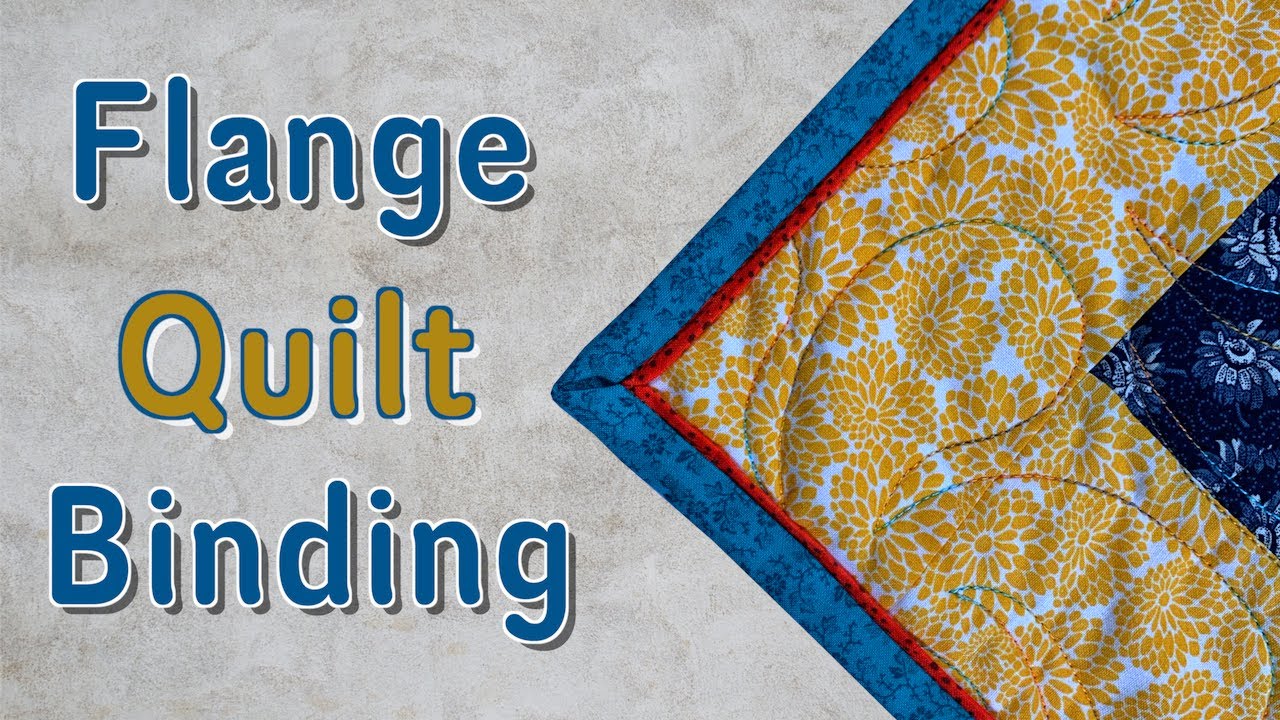
In simplest terms a flange binding is a decorative strip. What makes it great is that it allows you to frame your quilt in style.
Made of fabric that runs between the binding and the quilt top, It helps create a subtle or striking contrast in your quilt helping it stand out and catch the eye.
It can also help adding a pop of color and texture to your quilt.
2. Different types of Flange Binding
Okay, now let’s go over actual techniques. Flange binding is typically sewn in mainly two different ways.
The former method is done by putting use to two separate strips for the flange and the later binding method uses a single strip.
Both of them help people achieve two separate looks and obviously depend on your preference. Let’s go over both of them, one of one so you can easily decide which method to go with.
What You Need To Prepare?
For both of these methods you wanna prepare these two things. Namely, proper measurement and calculation of the number of strips you need.
First and foremost, you wanna begin by properly measuring the perimeter of your quilt. You need this measurement to accurately determine the length of binding you need.
Plus, you wanna make sure you have enough so, you’re gonna need to add an extra 12 inches. This will help you later with accounting for seams, corners, and finishing.
Now, let’s begin calculating the number of strips. To begin, you’re gonna divide the total measurement by the width of your fabric strips. which is usually around 42 inches.
One tip: you wanna make sure you also cut one extra strip to be on the safe side.
2. The Single Strip Method
Alight, it’s time to get into the actual method. Here’s how you do it
You wanna begin cutting the flange fabric. The size you wanna go with is 1 1/2 inches wide and the binding fabric 1 1/4 inches wide.
One crucial thing to remember is that the flange should be atleast wider than the binding fabric to get your desired contrast.
In the next step, start sewing the flange and binding strips together along their long edges. You are gonna aim for a 1/4-inch seam allowance. Then gently press the seam toward the binding fabric.
Moving on to the attachment to the back. First you are gonna begin by properly placing the binding on the back of the quilt. Remember you are gonna do this with the flange side facing down.
Then carefully align the raw edges of the binding with the raw edges of the quilt. Then began sewing it to the back of the quilt. For this you are gonna to use a 1/4-inch seam allowance, while mitering the corners as needed.
Okay it to finish wrap to the front, to finish properly first, fold the binding over to the front of the quilt. Once done properly, the flange will show slightly over the top of the binding, creating a beautiful border.
3. The Two Separate Strips Method
What if you want to use the separate strips method?, then here is what you need to do properly.
The steps in this method begin the same as the above. First and foremost if you are going for a 1/8-inch flange, then you wanna begin by cutting the flange fabric 1/4 inch wider than the binding fabric.
This is important because if you prefer wider binding later on you can easily adjust your measurements accordingly. Here is an example for better understanding, let say if you want a 2 1/2-inch wide binding. Your cutting should be the binding fabric which is 1 3/8 inches wide and the flange fabric which is 1 5/8 inches wide.
Alright, now let’s begin the actual sewing process of the strips. Here you wanna begin taking strips of both the flange and carefully binding fabrics together. Remember you are also including along their long edges with a 1/4-inch seam allowance.
Once done just make sure you press the seam toward the binding fabric properly.
Then comes the joining the strip part! Simply, get your strips which should be sewn together by now, and then carefully fold them in half lengthwise with wrong sides together. The reason you are doing this is because this will create your actual binding strip in this method.
Now, to properly finish you are gonna sew it to the back of your quilt. Here you are going to aim for a 1/4-inch seam allowance.
Next up, after sewing the binding to the back, you are gonna fold it over to the front of the quilt. And If done properly, the flange will peek over the top of the binding, here you just adjust it to give finishing and a visually appealing look.
")


7 Comments
These methods made sewing flange binding a breeze! The single strip method, with its 1 1/2-inch flange, gave my quilt a stylish contrast, while the two separate strips method, with a 1/4 inch wider flange, allowed for a customizable, visually appealing finish. Love the pro results and the helpful guide.
Flange binding really looks good on mats or blankets, the two methods you have given are incredible and all steps are easy to follow. It was an informative and thoughtful guide.
The clear breakdown of the two popular methods, the Single Strip, and the Two Separate Strips Method, is incredibly helpful to choose the technique that suits your preferences. The instructions, accompanied by practical tips such as the importance of proper measurement and the 12-inch extra allowance for seams, corners, and finishing, show a thoughtful consideration for the reader. Whether someone is a seasoned quilter or a novice looking to enhance their skills, this article is a valuable resource that encourages creativity and experimentation.
The meticulous commitment to the reader is evident in the directions, which are complemented by helpful hints like the significance of accurate measuring and the 12-inch additional allowance for seams, corners, and finishing. This essay is a great resource for anybody interested in quilting, regardless of experience level; it promotes experimentation and originality.
I really like this article because it helps me make a cool border for my quilt using the Two Separate Strips Method. It explains things step by step, especially how to get a tiny 1/8-inch border. Following the sewing part is easy, where I put the strips together and finish them. It talks a lot about pressing seams, making sure everything looks nice. When I sew the binding to the back and fold it over, the article says it’ll look super cool with the flange peeking out. It’s like a simple guide to make my quilt border look awesome!
This comprehensive guide explores the art of sewing flange binding, offering insights into its definition and purpose. It delves into two popular methods: the Single Strip Method, emphasizing the importance of proper measurements and contrasting fabric widths, and the Two Separate Strips Method, providing step-by-step instructions for sewing and finishing. Whether you’re a beginner or seasoned in sewing, this article provides valuable techniques to elevate your quilting skills.
This sewing guide on flange binding provides a comprehensive overview, covering the definition, purposes, and two popular methods for sewing flange binding. The detailed step-by-step instructions, along with the accompanying images, make it accessible for both beginners and experienced sewers. The inclusion of variations and tips enhances the guide’s utility, offering a well-rounded resource for anyone looking to elevate their sewing and quilting skills. As someone interested in sewing, this article serves as a valuable reference, providing clear instructions and insights into different techniques for creating visually appealing and professional-looking seam lines.