For anyone who enjoys sewing, learning how to sew pockets is one of the most crucial steps added to be better. .
Not only its practical skill but also a very rewarding endeavor. It allows for great personalization when it comes to creativity.
If you are somebody who wants to learn how to sew short with pockets, here is everything you need to know.
In this piece, let’s go over everything you need to know and then explore the step-by-step process of sewing shorts with pockets properly.
Interested? Let’s begin
1. Gathering Supplies and Materials
First and foremost, let’s go over everything you need to do this properly. You wanna gather these four things. Namely; fabric, pattern, notions, and elastic and some measuring tools. Let’s explore them one by one.
1.1 Base Fabric
The first thing you need to gather is the right kind of fabric. It should be something that suits the style and purpose of your shorts.
If you are going out for casual wear style then lightweight cotton or denim is the most recommended. On the other hand, if you are going for a sportier shorts than the only fabric you gonna need is moisture-wicking materials.
1.2 Pattern
Next comes the pattern. Now, selecting a shorts pattern might not feel like something you need, however, depending on your desired style.
Luckily, you can easily find them online, there are many patterns available for various designs and even various styles. This includes tailored, athletic, or casual shorts.
1.3 Elastic
Moving on, If your shorts will feature an elastic waistband. Remember, you wanna ensure and you have the appropriate width of elastic.
1.4 Measuring And Basic Tools
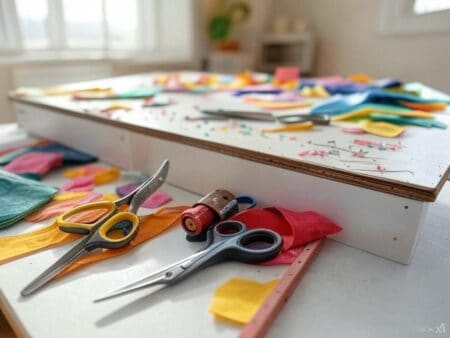
Last but not the least, gather all the basic tools you need. For example; a measuring tape or ruler, cutter, Then thread that matches the fabric, pins, scissors, and of course sewing machine.
2. How To Sew Shorts With Pockets – Making Your Pattern
Alright, now it is time to begin making patterns for the pocket.
First of begin by selecting a reference pair. It should be a well-fitting pair of shorts that match the ultimate style you wish to replicate in this little project.
Next comes making the right measurement for the project. The components you need to accurately measure are the inseam length, which runs from the crotch to the leg opening along one leg of the reference shorts.
Protip: Once you have the measurement don’t forget to add an additional inch to this measurement to account for the seam allowance.
Almost finished, now take measure of the width across both legs at their widest point. The reason you are gonna need is that, This measurement will determine how wide you should cut your leg pieces for the pattern.
Okay, it is time to begin the cutting process. Just cut out a pattern for each leg piece. Remember you wanna be extra careful here and ensure that the pattern is cut accurately and symmetrically.
3. Assembling the Pockets
Okay, it is finally time to begin assembling the pocket together. Follow my steps below to create and attach pockets:
3.1 Interfacing
Foremost comes the structural interfacing step, in this step, you wanna start by interfacing the wrong side of the more angled edge of the pocket piece. The reason behind this is simply, Interfacing provides stability to the pocket.
3.2 Attaching Pockets to Side Fronts
Alright, now carefully pin the pocket piece to the side front piece. Be extra careful here. You wanna make sure that they align the angled seams and matching notches.
Then all that is left is to sew along the pinned edge and do backstitching for security.
3.3 Press and Under stitch
In the Third step, begin by pressing the seam allowance toward the pocket. Here you wanna under stitch it. Doing this will helps to keep the pocket neatly in place.
3.4 Grading Seams or reducing bulk
The final is creating reducing bulk! To do this properly, trim one side of the seam to 3/8-inch using sharp sewing shears. Then you wanna clip the curve at the bottom of the crotch seam..
Note: One thing to remember is that a flat-felled seam can be used to sew the crotch seam.
4. Attaching Pocket to the Shorts
Okay, it is finally time to jump into the bread and butter of the story. Let’s begin the assembling process for the pockets.
Here’s how!
First and foremost you wanna begin by using the notches on the pocket pieces as a guide. These notches are crucial for a proper fit and appearance so, simply fold the pocket over itself.
Once again you wanna remember that the notches on both sides should align with each other.
Nextup pin both sides of the pocket in place and begin basting them within the seam allowance.
Here you wanna make sure that the pocket is properly matched to both sides, as indicated by the pins. The reason behind this is you want to ensure it will give a symmetrical look.
Now, The pockets and shorts are now ready for full assembly. Here one thing you wanna keep in mind is that you should treat the pocket section as one piece when you are sewing the legs together.
Moving on the Hemming stage! The shorts are still rough around the edges and need to have a clean and polished look. You are gonna need hemming to fix this.
Now, for hemming just fold up the bottom edge of each leg by approximately 1 inch and pin it in place.
Once done, here you want to begin sewing around the leg opening to create a hem.
Be extra careful here that you do not sew the front and back of the shorts together. Instead, sew the hemmed fabric around the leg opening.
Almost finished, Now after completing the hem, simply turn the shorts right-side out and try them on to check if they fit properly or not.
Closing Thoughts
Hopefully, following our guide above you were able sew pockets on you short, without any trouble.
Do you think we miss out on something? Let us know in the comment section below.


3 Comments
Thanks to this amazing guide, I effortlessly sewed a short with a pocket. The article’s tip on fabric selection, suggesting lightweight cotton or denim for casual wear and moisture-wicking materials for sportier shorts, added a practical touch. It also adds insight into selecting a shorts pattern based on desired style and the reminder to account for seam allowance in measurements. The step-by-step instructions on measuring and adding pockets seamlessly complemented the overall sewing process.
This is the most detailed explanation I’ve gotten on this topic. thank you for sharing the perfect fabrics to use and for your step by step explanation.
I consider this a new acquired skill acquired. I had a tough time trying to get this done a few times but couldn’t. But now I know better.
Thanks for sharing, this amazing piece.
It seems that I don’t’ need much to sew shorts with pockets. There are only 4 necessities including the fabric, pattern, elastic, measuring tape and other basic sewing tools. The steps of the process are also easy to understand. Thanks for such a detailed step-by-step guide.