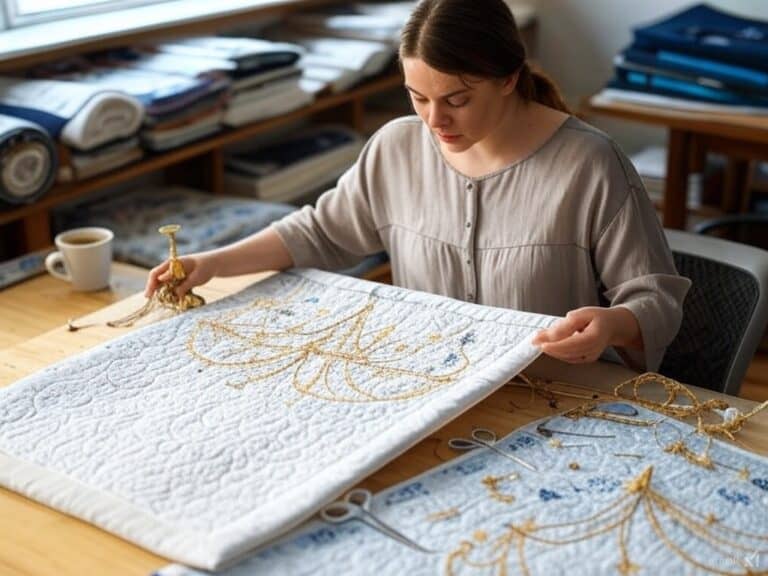
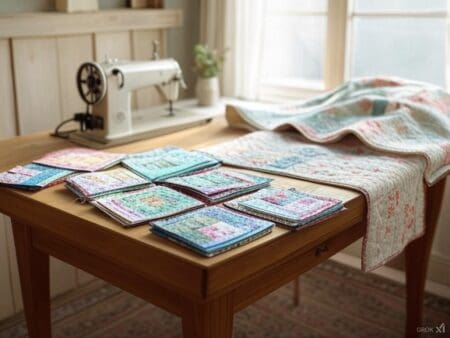
The chandelier quilt pattern, also known as the beads quilt, is a timeless design that adds glamour to any room. The blocks cascade like a chandelier, making it perfect for quilters who want a beautiful and doable project.
Take Jessica’s story for example. As a mom juggling family and hobbies, she often felt torn between her love of quilting and her busy schedule. When she found the chandelier quilt pattern she saw a way to combine her creativity with practicality using her growing charm pack stash. Her quilt brightened up her home and gave her a sense of accomplishment.
Whether you’re an experienced quilter or a complete beginner this guide will take you through every step of making a chandelier quilt from start to finish so you can have a quilt you’ll love for years to come.
1. Introduction to the Chandelier Quilt Pattern
The Chandelier Quilt Pattern is a beloved and versatile design that has captured the hearts of quilters for years. This pattern is perfect for those looking to create a beautiful and unique quilt that showcases their favorite fabrics.
Whether you have a stash of charm packs, fat quarters, or leftover fabric, the Chandelier Quilt Pattern is an excellent choice for reducing your fabric stash while making something stunning. With its easy-to-follow instructions and adaptable design, this pattern is suitable for quilters of all skill levels, from confident beginners to seasoned experts. Dive into this timeless design and watch your creativity shine.
You can get inspiration for the Chandelier Quilt pattern from many places and Art Gallery Fabrics® has a great way to do it. They show the unique construction of this quilt where blocks are sewn on point to make a diamond shape that turns into a square.
This construction technique adds a level of sophistication to the design making it modern and timeless. Working with curves and arranging blocks on point is a challenge but the result is a beautiful and eye-catching piece.
Have you ever made a quilt on point? Our “Chandelier” free quilt pattern is made out of curves and then assembled on point, which means that the blocks are sewn together to create a diamond shape, then trimmed and turned into a perfect square.https://t.co/y6YkCZeMJe#AGFVelvet pic.twitter.com/8kcPW8Nida
— Art Gallery Fabrics® (@ArtGalleryFab) March 29, 2021
2. Materials and Fabric Requirements
Before you start cutting and sewing you need to gather your materials. Proper planning is key to a smooth process and allows creativity to flow without interruptions.
Fabric: Choose a high-quality fabric that suits your design and color scheme.
Thread: Ensure you have a matching or complementary thread for your fabric.
Quilt batting: Select the appropriate quilt batting for your project. After layering the quilt batting and backing fabric, use a large cutting mat, a longer ruler, and a rotary cutter to trim them precisely for clean edges.
Sewing machine: Make sure your sewing machine is in good working condition and has the necessary attachments.
Cutting tools: Have sharp scissors, rotary cutters, and mats ready for precise cutting.
What You’ll Need
Charm Packs: Pre-cut 5” squares are the base of this quilt. They save time and come in coordinating colors. Depending on your quilt size, you’ll need 1-3 packs.
Background Fabric: A solid or subtle print that contrasts with your charm packs. 2-3 yards.
Batting: A size larger than your finished quilt top. The cotton-polyester blend works well for softness and durability.
Backing Fabric: Quilt Backing Fabric is the fabric that goes on the back of your quilt. Choose something that matches your top.
Binding Fabric: ½-1 yard to finish the edges of your quilt.
Fabric Requirements by Quilt Size
| Quilt Size | Background Fabric | Charm Packs | Batting Size | Backing Fabric |
|---|---|---|---|---|
| Lap Quilt | 2 yards | 1 pack | 60” x 70” | 2 yards |
| Throw Quilt | 2.5 yards | 2 packs | 70” x 80” | 3 yards |
| Twin Quilt | 3 yards | 3 packs | 90” x 108” | 3.5 yards |
Jessica remembers the fun of choosing her fabrics. She mixed soft florals with bold geometric prints for a modern look. “Choosing the right colors is like setting the stage for a story,” she said. “Don’t hurry – let the fabrics guide you.” Her thoughtful selections resulted in a beautiful quilt that enhances any home decor.
3. Choosing the Right Fabric
Selecting the right fabric for your Chandelier Quilt is essential to achieving the look and feel you desire. When choosing fabrics, consider the color palette, texture, and pattern. For a cohesive and harmonious quilt, opt for fabrics that complement each other in both color and texture.
You can use a single fabric collection for a unified look or mix and match different fabrics to create a unique and personalized design. If you’re using a charm pack, ensure it contains a variety of fabrics that work well together. For the background fabric, choose a neutral color that provides a clean and crisp contrast to the other fabrics, allowing your design to truly stand out.
Quilting is personal and a great post on the r/quilting community on Reddit shows that. A user shared their journey of making a chandelier quilt as a Christmas gift for their mom—a way to say thank you for her unconditional love and support.
This is what makes handmade quilts so special, every stitch is a testament to love and appreciation. The chandelier quilt with its beautiful design is not just a fun project but a way to say so much, making it a great project for gifts.
Made this chandelier quilt for my mum for Christmas as a thank you for everything she does for me.
byu/3mogs inquilting
4. Pattern Preparation and Cutting Instructions
Proper preparation is key to a successful quilt. Taking your time to cut and organize your pieces will make assembly much easier later. Proper preparation is also essential for successful machine quilting, ensuring that the process is smooth and efficient.
Cutting Dimensions
Charm Packs: Depending on your pattern you may leave the squares as-is or cut them into smaller pieces like 2.5” strips or triangles.
Background Fabric: Cut larger squares for corners and smaller squares for centers. Common sizes are:
- 6.5” squares: Corner pieces
- 4.5” squares: Center blocks
Binding Strips: Cut 2.5” wide strips for the binding. Make sure you have enough length to wrap around the entire quilt.
Pro Tips for Cutting
Rotary Cutter and Ruler: These will give you clean cuts.
Batch Cutting: Stack multiple layers of fabric (up to 4) to save time.
Label as You Go: Use sticky notes or small containers to organize your pieces.
Jessica made this step a peaceful afternoon. “I poured myself a cup of tea, put on some music, and let the cutting calm me,” she said.
5. Block Assembly Techniques
Now the fun part—assembling the blocks that make up your chandelier quilt.
Due to the use of charm packs, the chandelier quilt can also be referred to as a ‘charm pack quilt’.
Step-by-Step Guide to Sewing Blocks
Lay Out Your Pieces: Lay out the charm squares and background fabric for one block. Try different layouts until you find one you like.
Sew Smaller Sections First: Start by sewing together the smallest parts of the block. ¼” seam allowance.
Press Seams: Press each seam open or to one side to reduce bulk and help your blocks lie flat.
Finish the Block: Assemble the whole block, aligning edges and points. Use pins if needed to hold pieces in place.
Jessica’s tip: “Don’t rush the pressing step. It seems tedious but it makes all the difference in how clean your blocks look.”
Handling Triangles
Corner Triangles: Sew and flip.
Setting Triangles: Trim excess fabric carefully to maintain accuracy.
You can feel the sense of accomplishment in this post from Lindaeve on the r/quilting community on Reddit. She’s so happy in her “Finally Finished Friday” post showing off her bordered and bound chandelier quilt right out of the washer and dryer.
This is what it’s like to see a project through to the end—a testament to the time, skill and love you put into every detail. The chandelier quilt is beautiful and gives quilters not only beauty but also that feeling of total accomplishment.
Finally Finished Friday! My chandelier quilt, bordered, bound, and fresh from the washer and dryer. I could NOT be happier!!!
byu/Lindaeve inquilting
6. Quilt Top Assembly
Now that your blocks are done, it’s time to put them together into the whole quilt top. Different quilt patterns can be created by trying various block arrangements.
Arranging the Layout
Try Different Arrangements: Lay your blocks on a flat surface and try different layouts. Symmetry looks classic, and random looks modern.
Take Pictures: Take a picture of each layout to help you decide which one you like best.
Label Rows: Label each row with sticky notes or clips to keep your layout organized as you assemble.
Jessica loved this step. “It’s like watching a puzzle come together,” she said. “The blocks are pretty on their own but together they’re magic.”
Adding Borders
Borders frame your quilt and add width:
- Measure your quilt top to determine the length of your border strips.
- Sew the top and bottom borders first then the sides.
- Press seams open for a clean finish.
7. Customizing the Quilt Design
One of the most exciting aspects of the Chandelier Quilt Pattern is its versatility. You can easily customize the design to reflect your style and preferences. To add a personal touch, consider incorporating beads or other embellishments into your quilt. Experiment with different fabric combinations and color palettes to create a one-of-a-kind design.
If you’re looking to add a festive touch, using Christmas fabric or other seasonal fabrics can transform your quilt into a holiday masterpiece. With a bit of creativity, you can turn the Chandelier Quilt Pattern into a unique and stunning work of art that is truly your own.
The versatility of the chandelier quilt pattern is shown in this post by sci_major on the r/quilting community on Reddit. They made large baby quilts and used the chandelier design with charm pack blocks from the “Dancing in Paris” collection.
This is a great example of how quilters can use the chandelier pattern to fit any style, theme, or purpose. From playful to elegant the chandelier quilt can be adapted to fit any style proving it’s a go-to for quilters who like to mix classic with modern.
Large baby quilts: pattern Chandelier and then most of the blocks are from a charm pack of dancing in Paris
byu/sci_major inquilting
8. Quilting and Finishing
The final steps bring your quilt to life, turning a collection of fabric into a beautiful, functional piece.
Making the Quilt Sandwich
Layering: Quilt backing fabric face down, batting, quilt top face up.
Smooth and Secure: Smooth out wrinkles and secure with basting spray or pins.
Quilting Techniques
Straight Line Quilting: Great for beginners, this involves stitching straight lines across your quilt.
Machine Quilting: For more advanced quilters, machine quilting techniques, including free motion designs, add a personal touch and make the process more accessible and efficient.
Jessica chose diagonal lines, which perfectly matched the chandelier pattern. “It added just the right amount of texture without overwhelming the design,” she said.
Binding Your Quilt Pattern
- Sew binding strips to the edges of your quilt, mitering corners.
- Fold the binding over to the back and hand or machine stitch down.
Jessica’s tip: “Take your time with binding—it’s the final touch that ties everything together.”
Your Chandelier Quilt Awaits
Ready to start your own Chandelier Quilt? You can get the free pattern by clicking on the link below. This pattern includes step-by-step instructions, diagrams, and photos to guide you through the process of creating a beautiful and professional-looking quilt.
With this free pattern, you’ll be able to showcase your favorite fabrics and add a touch of elegance to any room. So why wait? Download the free Chandelier Quilt Pattern today and embark on your quilting journey. Create a stunning quilt that you can cherish for years to come!
The chandelier quilt pattern isn’t just a project—it’s an experience. As Jessica’s story shows it’s an opportunity to slow down, be creative, and make a beautiful quilt. Whether you’re quilting for yourself or as a gift, the process is just as fun as the finished product.
So why wait? Gather your fabrics, follow these steps, and watch your chandelier quilt come to life. The result will be a stunning work of art that you can cherish for years to come.


