")


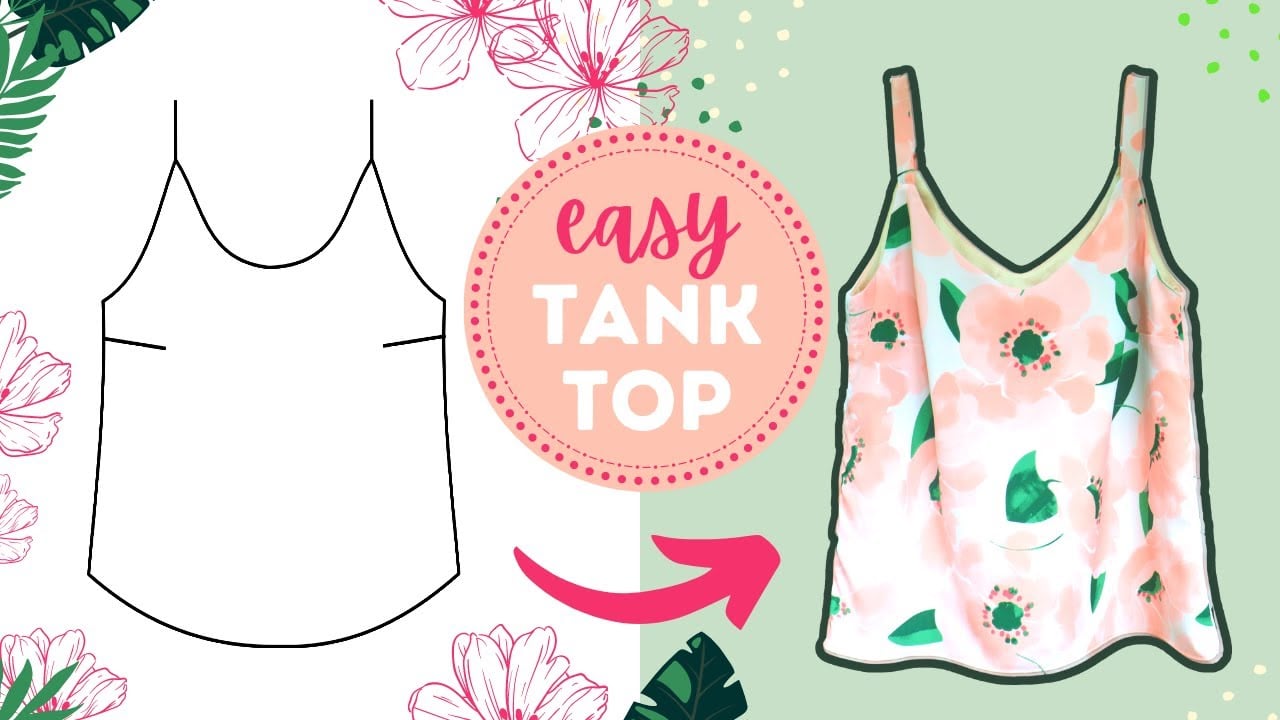
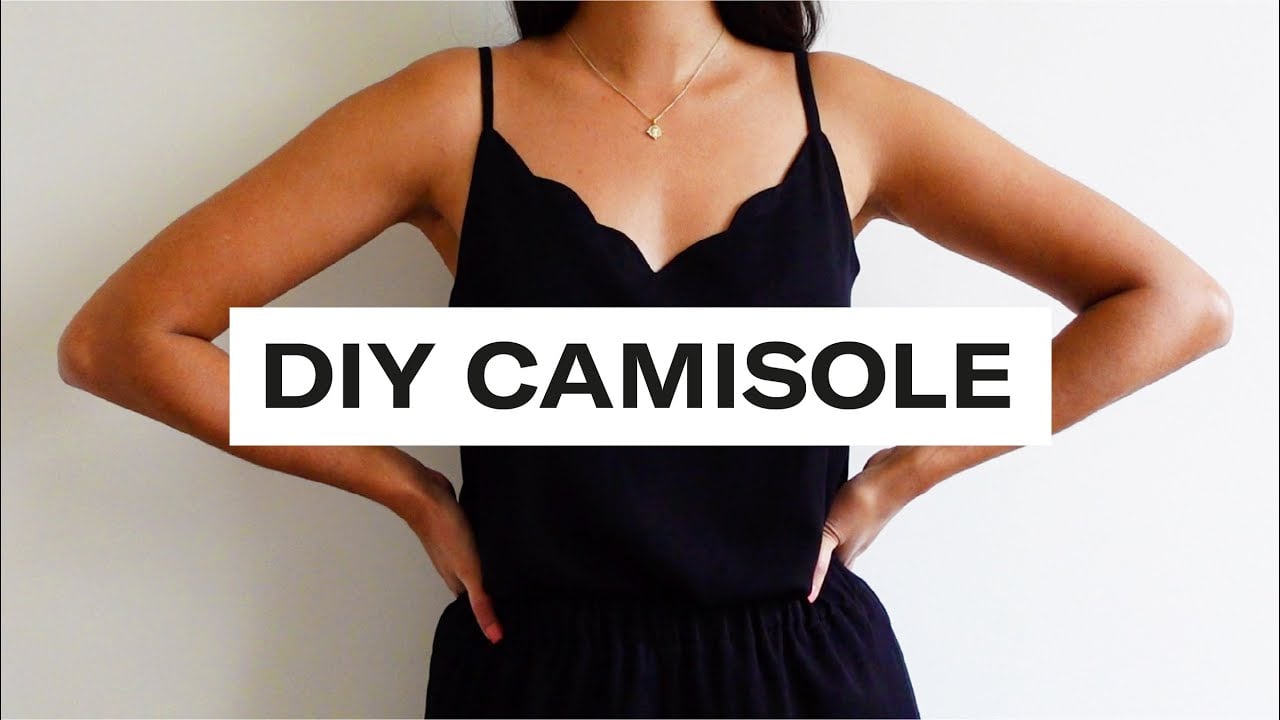
One versatile and timeless piece you can add to summer wardrobe to make it shine, is the cami top. Exuding a comfortable and chic vibe, Not only great for layering but cami top can also be worn on their own,
It does not matter if you are just starting out your sewing journey or seasoned master, crafting a cami top is a really great summer project for fun.
That will leave you with a stunning addition to your closet.
Now, if you are wondering how to go about it, don’t worry we got you covered. In this piece, we’ll go over the process of creating your very own cami top in simple and effective steps.
Let’s begin!
1. Preparing the Pattern
Before we begin, let’s get our basic building ready!

1.1 Select a Pattern
First and foremost let’s start with a pattern!
You wanna begin by carefully selecting a cami top pattern that perfectly suits your vibe. Now, you may already have some pattern in mind that you have found in scrolling instagram.
But I highly urge you to only go with patterns that are easy to attain with skill relative to where you are right now.
As some patterns are designed for beginners, making them a great option if you’re new to sewing.
1.2 Cutting the Fabric
Alright, Let’s begin with the cutting process of the base fabric.
First and foremost spread your chosen fabric on a clean and flat surface properly. You wanna make sure here that the fabric is lay properly smooth and free from any wrinkles.
Now, slowly position the pattern pieces on the fabric while running the smoothness of the piece.
Here you wanna ensure that the grain of the fabric aligns with the pattern’s guidelines properly. This is particularly important if you are using a fabric with a directional print in your project.
Now, just use your fabric scissors to cut around the pattern pieces. You wanna be precise here, and cut exactly along the lines to ensure all pieces fit together properly.

2. Sewing the Cami
Now it is finally time for the step by step sewing process. Here everything you need to do and consider.
2.1 Sew the Side Seams
First of all, you wanna begin with sewing the side seams.
Begin by placing right sides facing each other, then pin and sew the side seams of the cami. Do it carefully and remember to follow the seam allowance specified in the pattern.
This step will create the main body of your cami.
2.2 Prepare the Straps
Okay, on to the next step of preparing the straps to use.
This one is straight forward, first cut out fabric strips for the straps while making sure they are double the width you want the finished straps to be.
Now you may be wondering what should be the length you should aim for? The most recommended standard for the length is to aim for at least 50 cm.
The reason behind it is that it allows room for tying or adjusting the straps later on.
Moving on..by folding the strips in half lengthwise, right sides together, then finish by sewing along one short edge and down the full length.
2.3 Turn the Straps
Next up it to gently turn the straps right side out.
To do this, you wanna begin getting a knitting needle or a similar tool to push the fabric through the strap’s length.
One thing you wanna be super careful here is to ensure that you do not pull too hard as it would instantly break the stitching.
2.4 Attach the Straps
Moving the attaching step.
First and foremost carefully position the straps according to the pattern’s markings. Now, pin them to the front of the cami properly. You wanna ensure they are secured in place.
Alright, it is time to finish the step by simply sewing straps in the front seam of the cami.
2.5 Sew the Facing
On to the fifth step is about creating a neat finish around the neckline and armholes, attached facing to the cami.
Here you finally wanna begin the sewing process by facing the garment. Make sure to follow the pattern’s guidelines.
But remember to leave a small gap in the back to insert the ends of the straps later.
Next, carefully trim the seam allowances and clip any curved seams properly to allow for a smoother finish.
Finally, Insert the ends of the straps through the gap left in the back facing. And begin to Sew them securely in place.
2.6 Understitch a Facing
Okay, on to the understitch part.
Here you wanna ensure the facing lays flat and stays on the inside, when you under understitch it.
The core thing to focus here is carefully sewing a line of stitching close to the seam attaching the facing to the cami while ensuring the facing remains on the inside.
2.7 Hem the Bottom
Now, only the finishing and polishing is left.
Alright, begin by heming the bottom of the cami by folding the fabric up 5/8″ and then simply fold it again to meet the fold.
And finish it by carefully sew this hem in place to give it a polished finish.
2.8 Optional Hem Technique
Now, to trouble shoot in any mistake you also wanna take an alternative to the folded hem is to overlock the raw edge of the fabric.
Here just press it up, and stitch it in place. This technique will help you reduce bulk and provide a more delicate finish.
2.9 Troubleshooting the mistakes
Also, if you are having any troubles you can always use the bias tape get proper finish at the, top edge and shoulder straps of any camisole top you are making.
You just wanna cut the fabric pieces according to the paper pattern, ensuring a perfect fit for your new pattern and then secure the back bodice with a safety pin for added convenience

Closing Thoughts
And voila! Congratulations! You’ve successfully sewn your very first self-created own cami top, good job!
From here on out you can simply check YouTube tutorials or Pintrest for camisole sewing pattern and sewing tutorial to create a beautiful camisole pattern using your trusty sewing machine.
Hopefully, we were able to help you figure out how to sew a cami top properly. Now go and enjoy a lightweight and stylish addition to your summer wardrobe to achieve that aesthetic look.
Did you find our guide helpful? Let me know which steps worked for you and what your experience was in the comments below.


")
5 Comments
This article is a delightful and timely discovery for anyone looking to infuse a bit of DIY charm into their summer wardrobe! The step-by-step guide on sewing a cami top is not only a fantastic summer sewing project but also a creative way to personalize your style. The detailed instructions make it accessible for both beginners and seasoned sewers, ensuring a fun and rewarding experience. What I particularly appreciate is how the article combines simplicity with style, offering a versatile cami top that can be dressed up or down for various summer occasions.
Your step-by-step guide on sewing a cami top is like having a sewing buddy right beside me! Your clear instructions and tips make the process feel so doable, even for someone starting their sewing journey. Thanks for turning a potentially daunting project into something a fun.
Sewing a cami top is not an easy task and your guide is superb that has all the step by step approach to make it from selecting desired pattern to stitching.
The detailed instructions for creating a cami top are not only a fantastic summer sewing project but also a special way to show off your own style. Easy-to-follow thorough instructions ensure a good and fun experience for both rookie and professional sewers. The item is a versatile cami top that can be dressed up or down for various summery activities, and I particularly appreciate how it combines flare with simplicity.
I really liked this article about sewing a cami top. It explained everything step by step, from picking a pattern to sewing the straps and finishing touches. The tips on cutting fabric and creating a facing were especially clear. I found it helpful that they mentioned an alternative hem technique and how to troubleshoot mistakes. The author’s encouraging tone made it feel achievable, even for beginners. Overall, it’s a great guide for making a stylish cami for the summer, and I appreciate how straightforward and easy to understand it is.