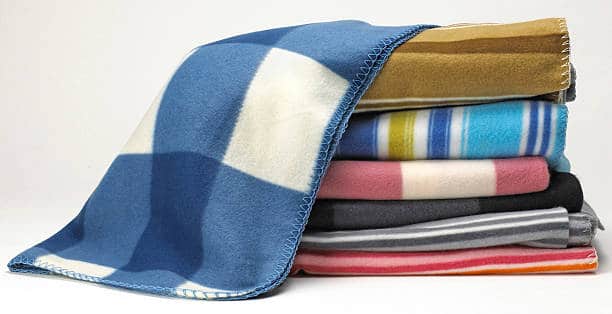
Blankets hold a special place in our lives. They wrap us in warmth, comfort, and memories. But what if you would know how to make a blanket out of t shirts without sewing, that not only keeps you cozy but also serves as a nostalgic journey through your cherished t-shirts?
In this guide, we’ll delve into how to make a blanket out of t-shirts without sewing, a creative way to repurpose your favorite shirts into a functional and sentimental masterpiece.

A. Materials Needed for the Project
A.1 Gather Your Materials
– T-shirts
To begin, gather a collection of t-shirts depending on the desired size of your blanket. Roughly, you’ll need about 20-30 shirts for a standard throw blanket.
Gather a collection of old t-shirts that hold sentimental value or represent significant moments in your life. These could be concert tees, sports jerseys, or shirts from memorable vacations.
– Scissors
Get a sturdy pair of fabric scissors capable of cutting through multiple layers of cloth.
– Ruler or Cutting Mat
For precise measurements, a ruler or a cutting mat with gridlines will come in handy.
– Cardboard or Template
Create a template of your desired blanket size using cardboard or any sturdy material.
– Fabric adhesive or fusible interfacing
These will serve as the glue to bond your t-shirt squares together.
– Iron and Ironing board
Essential for activating the fabric adhesive and ensuring a secure bond.

B. Preparing the T-Shirts
Here is your chance to play with colors and patterns to create a complete and cohesive design.
B.1 Prepare Your T-Shirts
Prepare your t-shirts by washing and drying them to remove any dirt or odors. Once clean, lay out each t shirt square on a flat surface and smooth out any wrinkles. Using your template, decide on the size of the squares you want for your blanket and mark them on the shirts using a washable fabric marker or chalk.
B.2 Cut Your T-Shirt Squares
With your shirts marked, carefully cut along the lines to create uniform squares no sew blanket. Remember to cut through both the front and back layers of the shirt for identical pieces of material for each square.
Take your time with this step for clean and precise cuts, as the quality of your squares and strips will determine the shape and overall appearance king size quilt of your blanket.
B.3 Arrange Your Squares
Once you have a stack of t-shirt squares, get creative with your desired layout. Experiment with different arrangements until you find a pattern that speaks to you.
You can organize the squares by color, theme, or simply mix them up for a more eclectic look. Lay out your chosen design on a flat surface, ensuring each square is aligned and evenly spaced.
B.4 Fuse Your Squares Together
Now comes the magic of bonding your t-shirt squares without a single stitch. Place a square of fusible interfacing fabric or fabric adhesive on the back of each t-shirt square. for this you should follow the manufacturer’s instructions for application.
Once applied, carefully position the squares back into your desired pattern or layout in a way so that they line up perfectly. With a hot iron, press down firmly on each square to activate the adhesive and create a strong bond between the layers.
Work in small sections not to move the squares out of place. You can join online quilting classes for detailed guidance.

C. Constructing the Blanket
The construction process is straightforward but requires patience. Lay two t-shirt squares face-to-face and tie their corresponding edges together using small strips cut from the first t shirt square as remnants. Continue to repeat this process to create rows and columns until all pieces are connected.
Finally, secure and tie the outer edges by tying them back onto first t shirt square or by themselves. thus, create a fringe that adds texture and character to the edge of the blanket.
C.1 Assemble Your Blanket
As your squares bond together, watch your blanket come to life before your eyes. Once all the squares are securely fused, it’s time to assemble them into a cohesive whole. Begin by arranging the squares in rows, ensuring they fit together snugly.
Once you’re satisfied with the layout, carefully lift each row and stack them in order. Then, starting with the bottom row, attach the squares together using additional fabric adhesive or fusible interfacing along the edges. Continue this same process until all the rows are attached, creating a seamless blanket of memories.
D. Finishing Touches
Your blanket is almost ready! Fluff, adjust and tie the knots to ensure even distribution and a comfortable feel. Washi and dry the blanket to settle the ties and gives it a delightful softness.
If you wish, add personal touches such as additional patches from other fabrics or iron-on decals to make the blanket uniquely yours. You can add a border to your blanket using excess t-shirt fabric or complementary materials.

Tips for How to Make a Blanket Out of T-shirts Without Sewing
Some useful tips to enhance your experience while making a no-sew t-shirt blanket:
1. Choose the Right Shirts
Select t-shirts made from cotton or a cotton-blend fabric for optimal results. These fabrics are soft, durable, and easy to work with.
2. Test Your Adhesive
Before applying fabric adhesive or fusible or interfacing fabric glue to your t-shirt squares, test it on your clothes in a small, inconspicuous area to ensure it doesn’t cause any discoloration, wear or damage.
3. Use a Cutting Mat
When cutting your t-shirt squares, place a cutting mat underneath sewing machine to protect your sewing machine and work surface and ensure precise cuts.
4. Keep It Symmetrical
Maintain symmetry in the rest of your fleece blanket layout by ensuring all your fleece squares are cut to the same size and aligning them carefully during assembly.
5. Don’t Overcrowd
Avoid overcrowding your blanket bed with too many squares, as this can show how to make a blanket out of t shirts without sewing it bulky and less comfortable. Aim for a balanced layout with more shape and adequate spacing between squares.
6. Mix Textures and Colors
Experiment with different textures and colors to add visual interest to your blanket. Mixing solid-colored shirts with graphic prints can create a dynamic and eclectic look.
7. Secure Corners
Secure the top edge of each square with extra fabric adhesive or fusible and interfacing fabric to prevent them from curling up over the edge t shirt fabric over time.
8. Practice Patience
Crafting a t-shirt blanket is a labor-intensive process that requires patience and attention to detail. Take your time with each step, and don’t rush the assembly process.
9. Embrace Imperfections
Imperfections are part of the charm of a handmade blanket. Small wrinkles or irregularities in the fabric add a bit of character and authenticity to your creation.
10. Personalize It
Add personal touches to your blanket by incorporating embellishments like fabric patches, embroidery, or fabric paint to commemorate special occasions or personalize it further.

Conclusion
Crafting a no-sew t-shirt blanket is more than just a DIY project; it’s a labor of love that transforms cherished memories into tangible warmth. Whether you’re repurposing old shirts or preserving moments from the past, this guide for how to make a blanket out of t-shirts without sewing offers a unique way to stay cozy while reliving your favorite moments.
So gather your t-shirts, sharpen your scissors, and embark on a journey of nostalgia and creativity as you weave together all the pieces and threads of your life into a beautiful blanket of memories.


2 Comments
I have read so many articles concerning the blogger lovers but this piece of writing is genuinely
a good piece of writing, keep it up.
Thank You very much, it means a lot to me.