Welcome to the world of hat personalization! But, for that you need to know about how to sew patch onto hat! A patch can tell people about your personality, and achievements. It’s a simple way to add an intriguing touch without having to use your words.
This blog will define what a patch is, its importance, how to sew patch onto hat and highlight the benefits of adding one to create custom patches to your hat.
What are Patches?
Patches come in all different shapes, sizes, and designs. They’re fabric pieces with embroidery on them that have either been machine sewn into woven patterns or printed on as illustrations. Patches aren’t just for fashion – they also cover up damaged clothing or clothing that’s been worn too much.
Sewing a patch onto a hat has more practical benefits than you’d think at first glance. It can extend the life of the hat by covering up holes or stains. But more importantly, it allows you to customize your hat based on whatever identity you want people to see when they spot you walking down the street or when someone takes a picture of you at an event.
The benefit range of adding a patch starts with making something look better and ends with showing off membership details in clubs, organizations, military units – it could even be perfect for someone who loves crafts and DIY projects.

Necessary Materials and Preparation for How to Sew Patch Onto Hat
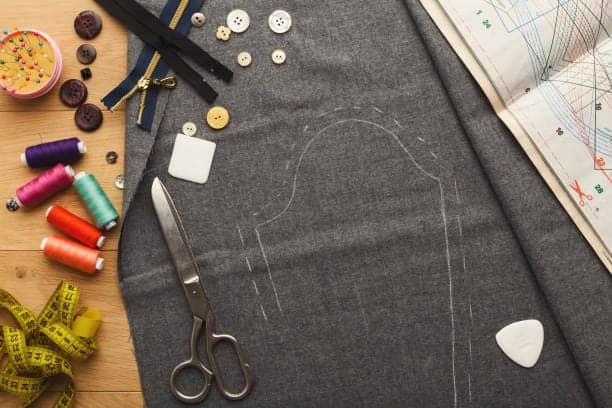
Before actually sewing anything together there are materials that need to be gathered. You’ll need a hat (hopefully), patch (something that represents what you want people to know about you), needle and thread matching the color of said hat inside the patch and scissors.
Just as important as gathering these materials is, setting up properly for how to sew patch onto hat so no accidents happen along the way. Find somewhere clean and flat with good lighting where you have enough room to move around comfortably.
Since sharp objects will be present like needles and scissors make sure kids won’t touch them! And if possible use something like a thimble!
Choosing the Placement
The first step before actually how to sew patch onto hat is deciding where you want the patch to be on your hat. This will depend on what you’re trying to show off and the design of the patch itself.
There’s a lot of places one could be put: front, side or back. Once you finally make up your mind mark it with either a fabric pen or chalk.
Step-by-Step Sewing Process
Step 1: Position the Patch
The beginning of actual sewing starts with pinning down where you want the patch to attach to be on your hat. Take into consideration size and shape when doing this along with how well it matches the hat’s design and structure. Use pins to hold it in place so there’s no movement during the process.
Step 2: Thread the Needle
Looking for direction towards how to sew patch onto hat? You’ve found it! Select a color that matches either the patch or the hat and then thread it through a needle – tie a knot at its end. Make sure there’s enough thread for you to sew through every stitch length and edge of the patch without running out!
Step 3: Begin Sewing
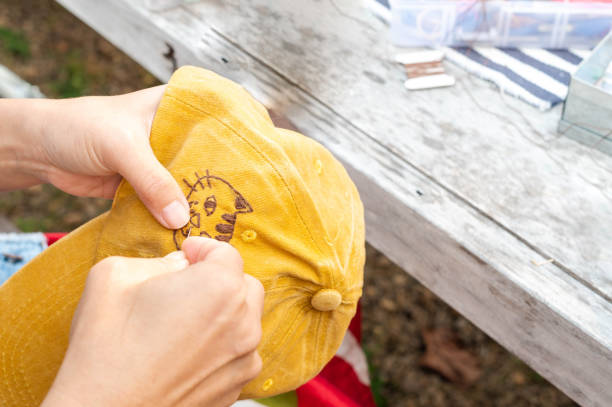
Starting from the back, push the needle through both the patch and the hat. Then pull until there’s no slack on either side of the thread. Tie it tight against each fabric using another knot.
Push that still threaded needle back through once to make a stitch. Keep repeating this until every part how to sew a patch onto hat, has been stitched.

Step 4: Lock The Stitch In
You don’t want all your hard work to come undone at any point. Knotting that thread at the end of your stitching will keep everything together. Create a loop with your needle and thread, then push that needle right back through it and pull tight. You can even do this step one or two more times if you think it’ll help.
Step 5: Trim It
Grab some scissors and trim any excess string off that knot you just made. Then cut off anything extending past the first sew patch too. But be careful not to damage the sew patches or any fabric or stitches in the process.
Step 6: Call It A Day
Look over your glued on patch and see if there’s anything else you need to stitch up or fix about it. If not, plop, glue it onto your head and bask in how good you look now!
It may seem simple but attaching custom patches on to hats adds style and personality to them unlike ever before! Use these steps of how to sew patch onto hat confidently as a guide on your journey towards customization cap greatness.
Pro Tip
– Do patches look good on a baseball cap or hat? When shopping for them, ask yourself just that before making a purchase.
– Sewing takes time! Make sure those stitches are done well all around.
– If you’re inexperienced with sewing machine, sewing, try practicing first so mistakes aren’t easily made.
– Do thimbles prevent poking? Give one of those a shot if a sewing machine isn’t your thing.
– Check twice before adding permanent changes!
– Will extra strength be needed? Add more stitches if the patch is big or heavy!
– Don’t like sewing hats? Patches can also stick to a hat with an iron or glue!
– Placement matters! How it feels on your head will change depending on the location where it is.
– Have more options for fun with customization! Add more patches or accessories or even try some embroidery.

Common Challenges
1) Threading – Needles have small eyes. So people who don’t see well or have poor dexterity may struggle here. Do everything slowly so you hope you don’t make things worse for yourself later!
2) Thick Fabric – Hats aren’t light and thin clothing articles. That means pushing a needle through can be tough. Push harder and consider using a thimble if necessary.
3) Stitches – You want each one to look the same as the last. Making them evenly spaced and long will make your hat look professionally made.
4) Knots – If that patch falls off, everyone’s going to laugh at you. Put that thread around multiple times just to make sure this doesn’t occur.
5) Pick the right one – No one likes when colors clash. So take your time when choosing a patch. Make sure you love everything about it too!
Keep trying and don’t worry about it if you mess up. Give it enough time and you’ll be sewing patches to baseball caps like a god. Don’t doubt yourself and keep going.

Last but not least
Sewing a patch onto a hat is simple. It’s fun, anyone can do it, and you can do it all from the comfort of your own home. Long story short, just get the right materials, prepare for everything that needs to happen before stitching, have the right mindset before you start working on your hat, then go at it step by step.
If everything goes according to plan, soon enough you’ll be looking at a clean professional hat.
Don’t rush yourself in the process of how to sew patch onto hat or think that you’re running out of time either. Just take each process one step at a time so we don’t mess up later when we’re already too deep into this project.
Also remember that there is no wrong way to put on these patches! You can stick em anywhere because they can fit anything. So try different spots until you find what’s perfect for you.
So have fun with this whole thing! Take pride in creating what ever comes out of this process because remember this is all about expressing ourselves!


