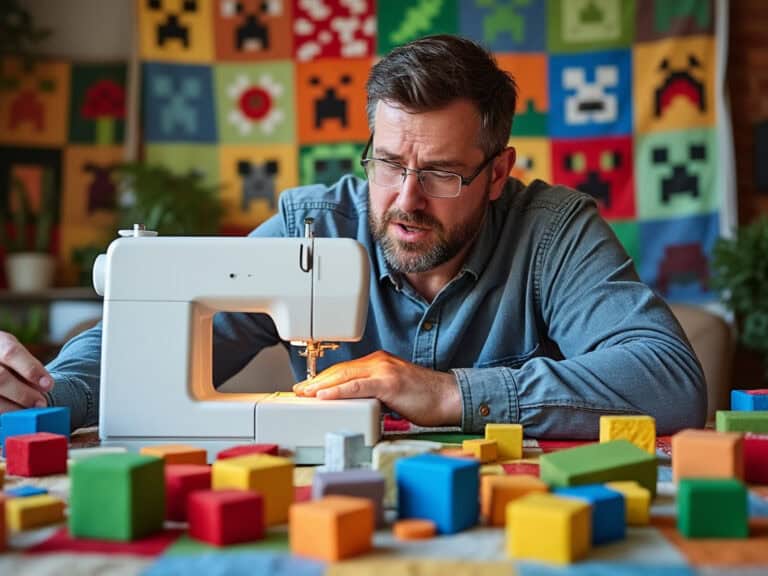
Let me be honest, my first quilt was a challenging experience I wouldn’t want to go through ever again.
I was just an excited father wishing to blow his Minecraft-obsessed child away. No skills and plenty of hopes, and what’s the result – my creation would have more fittingly been called a patchwork monster than a Creeper head. That day I discovered two things: one, don’t get too sloppy; and two, quilters deserve far more credit than they receive!
At least I didn’t lose hope. I had to learn basic quilting skills to improve my technique. Minecraft is a suitable tool for my sewing machine thanks to its blocky graphics. It’s a game that combines cultures with a hobby that’s a few generations apart. For gamer parents who want to spend some time with their kids or simply get working on a fun chest-expanding project, this manual is your gateway to strange yet extraordinary.

1. The Top 5 Quilting Tools and Supplies I Always Keep on Hand
Before I begin and start ripping fabric apart as a wild player cuts wood, this is what I am going to need:
Rotary Cutter and Cutting Mat: Have a steady hand when cutting those squares as they are essential in the quilt you are going to make.
Quilting Ruler: Freehand cutting looks nice in practice but could be a huge mess in reality. I suggest you to use this tool.
Sewing Machine: This can’t be avoided if you do not wish to look like someone from the 19th century.
Iron and Board: Sure, you might end up ironing more clothes than a professional dry cleaner, but the finally smoothed seams are worth it all. The satisfaction of seeing those seams smooth and knowing your project is finally finished is incredibly rewarding.
When I first started out, I never thought any rotary cutter for the sewing machine was worth my time. It felt like trying to pick up a sword. In my self-confidence, I cut too hastily and ended up with a scraggy unusable mess of fabric. Learning point: always measure twice and cut only once.
2. Understanding Minecraft Quilt Patterns
Minecraft quilt patterns are a treasure trove for quilters looking to bring the pixelated charm of the game into their sewing projects. These patterns typically feature iconic blocks and characters from the game, such as the Ender Dragon, Zombie, and Blaze, making them perfect for creating unique and personalized quilts.
When diving into Minecraft quilt patterns, it’s crucial to pay attention to the block size, fabric requirements, and piecing instructions. Each pattern will have its own set of guidelines, so make sure to read through them carefully. Consider the finished size of the quilt and the skill level required to complete the project. Some patterns might be more complex, requiring advanced quilting skills, while others are perfect for beginners.
You can find Minecraft quilt patterns online or in quilting books and magazines. Some patterns are available for free, while others might require a purchase or subscription. If you’re feeling creative, you can even design your own Minecraft quilt patterns using graph paper and a pencil. This way, you can tailor the quilt to your specific preferences and create something truly one-of-a-kind.

3. Why Having Quilting Designs In Minecraft Is Worth Its Weight In Gold
To characterize it, a Minecraft avatar is primarily a walking quilt. Every pixel is a fabric square in perfect congruity with the design. As if this wasn’t enough, the designs features great colors that add Creeper green and Enderman black making it look quite good.
Now imagine when your child has a quilt block of his or her favorite character. Just the thought of it should make one feel happy to imagine such a scene when the child sees it. My son said once when he saw a quilt designed like a Creeper, it was the coolest thing ever. What a compliment to an eight-year-old! Kelli’s patterns are easy to follow and popular among quilters, making the project even more enjoyable.
Using fusible grid techniques for other blocks helps maintain stability and alignment, ensuring consistency across various block designs.
4. How I Choose the Perfect Fabrics and Colors for My Quilts
Now, this is where the fun starts:
Fabric Type: The best option is cotton. Forget the heavy ones like denim unless you want cut fingers and a damaged machine.
Colors: Characters should be depicted with solid colors. Creeper can be colored with various greens that include olive shades, but Steve wears blue and tan colors.
Fabric Quantities: If you are making a lap quilt which is (50”x60”) the fabric you require includes:
- Two and a Half yards of background fabric
- One yard per main design of the character fabric
Pro tip: Use a screenshot from Minecraft to get the colors right. In the past, I thought it would be clever to ‘search’ for Creeper colors and paint a picture of my son’s ‘Zombie Steve’ character instead.
Creating my son’s Minecraft quilt was a memorable experience, and the excitement it brought to him with each new block was priceless.
5. Essential Quilting Techniques I rely on
Mastering quilting basic skills is essential for creating a stunning Minecraft quilt. Here are some key techniques to get you started:
- Piecing: This involves sewing together individual blocks to create the quilt top. Use a 1/4 inch seam allowance and press the seams as you go to ensure everything lines up perfectly.
- Block Construction: Constructing each block involves sewing together pieces of fabric to form a single unit. Use a rotary cutter and mat to cut the fabric pieces accurately, ensuring each block is uniform.
- Sashing and Borders: These elements separate the blocks and add a finished edge to the quilt. Maintain a consistent seam allowance and press the seams to keep everything tidy.
- Quilting: This step involves sewing together the quilt top, batting, and backing fabric. You can use various quilting techniques, such as straight-line quilting, free-motion quilting, or hand quilting, to add texture and dimension to your quilt.
- Binding: The final step is attaching a decorative edge to the quilt. Use a consistent seam allowance and press the seams to achieve a professional-looking finish.
By mastering these essential techniques, you’ll be well on your way to creating a beautiful Minecraft quilt that will impress both gamers and quilters alike.

6. Turning Pixels into Quilt Blocks, My Way
Because of this very blocky style, the game almost makes it impossible to mess quilting up (almost). This is how:
Break It Down: Each pixel becomes its own fabric square. Using graph paper, sketch the design you will use.
Cut Precisely: This step involves the use of a rotary cutter to make sure that the squares are equal. Cutting a lot at once helps save on time!
Chain Piecing: Quite a number of interspersed blocks are attached to the sewing machine and stitched up in one long line. It is useful as well as strangely pleasing.
On my very first Creeper block, I, in error, mixed up two of the squares. My son called it “Creeper’s Derpy Cousin” and we all laughed so much I said to myself, ‘uh, fine, I’ll keep it.’ A mistake is not the end of the world, it can be entertaining – so, own it!
7. Crafting the Iconic Creeper Block, My Quilt Adventure
Now let’s get on with my favorite design pattern.
Materials Needed:
- Light and dark green fabric
- Black fabric for the face
Cut Squares: Use the 2.5” template to cut out approximately six slightly darker green squares and approximately three black squares and crepe fabric that will form the face of the creeper doll.
Layout: Spread the squares on the table so that they represent the face of a creeper.
Sew Rows: Assemble the squares one row at a time and iron the seams to join them.
Joining the Rows: Place the rows together in such a way that all the seams meet.
Pro tip: It is also useful to have a picture of the external reference. A take with a teaching example is ideal. I can tell you that my Creeper face used to look like a shaved one’s face with a moustache which was funny, in fact, but not what I was trying to create.

8. Bringing Complex Minecraft Characters to Life in Quilts
After mastering the Creeper’s, please try:
Steve & Alex: These have simpler features which are easier for a beginner to learn.
Enderman: For those who are trying to be edgy, as it requires lots of black and purple, this can be a moderately designed but sleek character.
Scaling Up: If you want to make twin-sized quilts, all that is required of you is to scale the size of the square ‘pixels’ and do not repeat the design or go through a sculpting process again.
9. Assembly and Final Touches
Now this is the part where everything comes together:
Cut the Squares: Place the quilt top on a table and work out its design.
Connect the Block Units: Construct the quad block unit rows, ironing inside seams during the process.
Addition of Quilting: Use straight line quilting to add texture to the pixel effect.
Final Touches: Conclude with a border to enhance the finishing of the work.
Personalization of the work such as using a blend of colors or labeling the quilt with “player 1” brings a cool touch into the work. To this day my son often boasts about the little diamond pickaxe that I stitched into his quilt’s corner long ago.
Creating a Minecraft thematic quilt, however, is more than creating the final quilt. It’s about creating memories, it’s about creating moments and most importantly it’s about quilting something one of a kind. Grab your fabric, put on your gamer hat, and get ready to make a quilt that would give a diamond sword a run for its money. Ready? Let’s go!

10. My Tips for a Perfect Minecraft Quilt
Creating the perfect Minecraft quilt requires attention to detail and a few handy tips:
- Choose the Right Fabric: Opt for high-quality fabrics suitable for quilting. Cotton or cotton blends are ideal for achieving the best results.
- Use a Consistent Seam Allowance: Maintain a consistent seam allowance throughout the quilt to ensure the blocks and sashing fit together accurately.
- Press the Seams as You Go: Pressing the seams as you go helps reduce bulk and makes the quilting process smoother.
- Use a Walking Foot: A walking foot can guide the fabric smoothly, preventing bunching or dragging, and ensuring even stitching.
- Quilt Slowly and Carefully: Take your time while quilting to avoid mistakes and ensure the quilt is evenly quilted.
- Add a Label: Personalize your quilt by adding a label with the maker’s name and the date of completion. It’s a lovely touch that adds sentimental value.
- Use High-Quality Batting: Choose a high-quality batting, such as cotton or wool, for the best results. It will add warmth and structure to your quilt.
- Bind the Quilt Carefully: Binding the quilt carefully creates a professional-looking finish. Take your time to ensure it’s done neatly.
By following these tips, you’ll be able to create a Minecraft quilt that not only looks fantastic but also stands the test of time. Happy quilting!


